 JUN032011
Stuffed Fabric Turtles (with pattern pieces)
We were shopping around, down in Florida, after we went to the zoo several weeks ago
(yes, in Jacksonville…..some of you asked)……..and we stopped by a Pottery Barn Kids store.
I’m a window shopper. Well, and an inspiration-seeker shopper.
I love walking around and daring myself to find something I want to make. Ha.
Want to go shopping with me?
I might drive you crazy.
Then you and my husband will have something in common.
While we were there…..we saw some cute little stuffed turtles.
So I snapped a picture with my phone, and I decided to try and figure it out at home.
So, here’s my version…..a bit different, but just as sweet.
They are soft and plump and are perfect for little hands.
…..and the tail may be my favorite part.
After making one, you better let your turtle explore outside.
Would you like to make your own?
Turtle pattern pieces found here. (print off and cut out)
Cut out all of your turtle pieces, in whatever fabric and color choices you want.
(You don’t want to use a stretchy fabric, or the turtle won’t hold its shape very well.)
If you want to make your turtle all one color or all different colors, it’s up to you.
Now, place 2 of the leg pieces together, with right sides together, and sew up around the outer edges, leaving the top straight edge open. Do the same with the other legs pieces, making 4 legs. Now, do the same thing with your head and tail pieces.
Next, turn all of these pieces right side out, using a pencil or a paintbrush end to help you poke them right side out.
Now, fill each piece with some stuffing (I used polyester fiberfill)……..using something like the end of a paintbrush helps to shove that batting into those small pieces.
Then sew each piece closed, about a 1/4 inch from the end.
Now, sew 2 of your shell pieces together along one side (with right sides together) and then sew the other 2 together. (Make sure that the shell pieces are right side up while sewing together, or the sides won’t match. The black dot on the shell pattern piece is the top of the shell.)
When sewing the 2 shell pieces together, start at the top of the shell (where the big circle is on the pattern piece) and go down along the one side. Be sure to start right at the center of the top of the triangle piece….don’t cross that imaginary line down the center.
Then, open up the shell pieces. These are going to be on the sides of your turtle.
Now grab one of the side sections and pin your head to the front end with the raw edges matching up. Place it about a 1/2 inch from the bottom of the shell. Then place the tail at the other end, about a 1/2 inch from the bottom as well. Sew the head and tail in place, about a 1/4 inch from the edge.
Then place the other side of the shell right on top, with right sides together. Sew from the center top, down one side……then start at the top again and sew down the other end.
Turn the shell right side out and it should look like this.
Flatten the shell down flat, then start pinning the feet to the shell. Center each foot at the center edge of each shell section. Sew each foot in place, using a 1/4 inch seam allowance. (Add a little sewing tag at this point too, if you have one.)
Then turn your shell inside out and place right on top of the circle turtle bottom (that’s right side up). Pin all the way around the turtle, attaching the shell to the bottom.
Then sew all the way around the base of the turtle, using a 1/4 inch seam allowance…..and leaving about a 3 inch opening along one side, between two of the side legs.
Next, turn the turtle right side out and begin shoving it full of your stuffing (I used polyester fiberfill)…
**When shoving your stuffing in, you’ll need to shove in enough to really expand the shell.
If you don’t have enough, it won’t round out……….but if you shove in too much, it will be too lumpy.
Really move the stuffing around and smooth it out as you’re filling it up.**
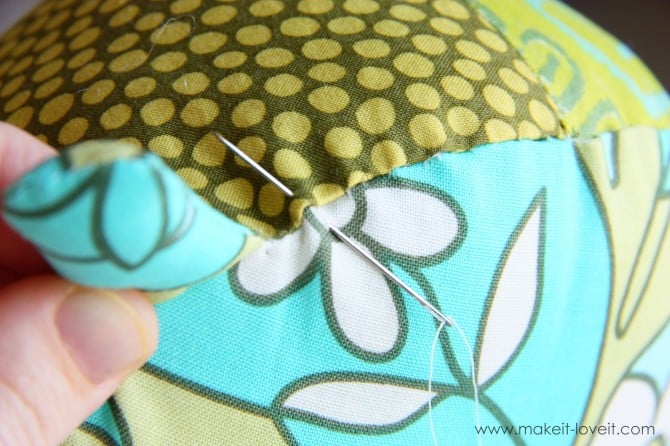
Then tuck your raw ends towards the inside, and use a blind stitch to sew your turtle closed. (Need help with the blind stitch? Click here.)
Now, that’s it.
You’re turtle is complete.
Now make several more and create a turtle family……or give each and every one away.
Because what child wouldn’t love a new little turtle friend?!!
Enjoy.


Nenhum comentário:
Postar um comentário