
Six Strands - Braided Headband

The only problem with most of the one's I see in the shops is that they look like someone started a sweater and gave up at the rib!
This one should dispense with any such suspicions.
Like most people, I had a bit of apprehension as to whether I could braid 6 strands or not. Once I got into to it and saw the pattern developing, I found that it is so easy that I could just as easily have used 7, 8,10, or 20 strands!
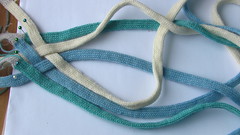
I have included some photos of how I did it and you very quickly see the pattern develop. If you have any questions, feel free to ask.
Pattern for Six Strands (extra detailed Tutorial HERE)
Total length 56cm x 7.5cm / 22" x 3"
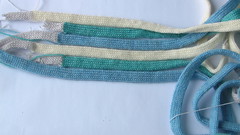
Yarn: Yarn: Pierrot Yarn Soft Merino Fingering in colours Ivory,Light Blue, and Cobalt Green
Total weight of finished headband is 49g / 204 m of Soft Merino Fingering.
Six Strands -approx. 110" cm / 43" x 1.25cm / 0.5"
Gauge :5 stitches would give the width of the band.
Cast on 9 stitches: 5 main bed and 4 ribber with waste yarn and do the perfect selvedge.
Knitting in the round and T.5 knit until desired length and take off with waste yarn.
Repeat this twice for each colour giving you 6 strands.
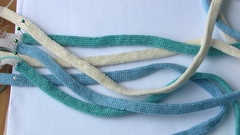
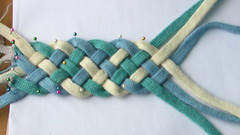
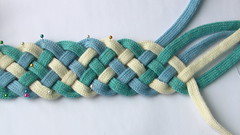
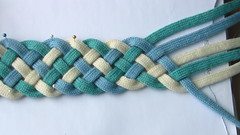
Pin them on a sheet of paper on a cushion and continue as follows in these photos:

Cables and braids have one thing in common, they form perfect rings if you have them the right length. Measure the headband on your head, without stretching it, and see if it is long enough or too long. Too much can be ravelled back.
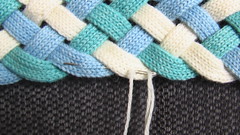

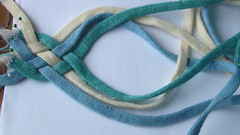
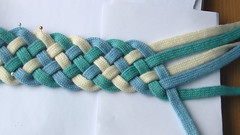
I took a long strand of the natural colour and backstitched it through all the strands from start to finish at the back (the top of the photo).
A backstitch on every cable ensures that the headband keeps it's correct length when it's worn. Then I decided to go the whole way, and sew the bands together from the back as you see in the photo.
At the join in the back, when you are joining the end of one band to the corresponding start band in the same colour, you don't need to graft. Just be sure to place the join behind another band. I found it easiest to pin the band to the back of another band and ravel back to where the pin was. Cut the yarn and just thread it through the stitches and fasten them with backstitch to the back of the band covering it.
Note: If you start each of the bands at a slightly different place, then the joins can be staggered over an inch or two, helping to make it completely invisible.
For a warmer headband, of if you really don't want to start stitching the back, it could easily be attached to another piece of band 22" long, and knit in the same way as the others.
I don't recommend using material for this, as a headband should have some stretch to hold it on.
Nenhum comentário:
Postar um comentário